Jack – The Pumpkin Sock Monkey

Around this time of year, we are inundated with pumpkins- from pumpkin spice lattes to pumpkin chili. I actually enjoy pumpkin pie, pumpkin muffins and pumpkin spice lattes, but I do have my limits. I cannot fathom trying pumpkin chili or pumpkin soup. Anyways I thought we could use a pumpkin inspired sock monkey. Of course, you can use this pattern for any type of sock monkey, just change the colors and use your imagination!
Sock Monkey
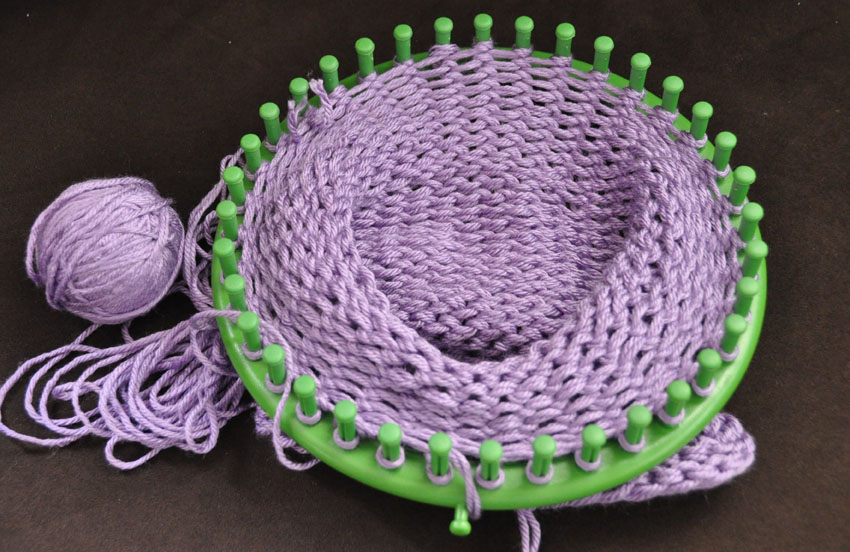
<Free Pattern>I made this hat on a 31 peg loom for a young child
To create a this brim
–Using 2 strands of green yarn
Row 1: e-wrap the pegs (for this type of brim-garter stitch- I don’t use the peg on the side. I typically begin with the 1st peg and have my slip know part of the brim)
Row 2: purl stitch
Row 3: e-wrap stitch
Row 4: purl stitch
Row 5: e-wrap stitch
Row 6: purl stitchFor the face
–Using a white yarn and an orange yarn
e-wrap until the hat is 4.5 inches long (from bottom of brim to top)
My row count is 15 (not including the brim)For the top of the hat
–Using 2 strands of orange yarn
e-wrap for 3 rows
–Change to 2 strands of white yarn
e-wrap for 3 rows and close the hat using the gathered method
(our friend, Denis at Loomahat.com a great tutorial on how to close that hat here)For the Ears (Crochet)
–Using a white yarn and an orange yarnWe followed a YouTube TutorialFor the Mouth (Crochet)
–Using a brown yarn
Crochet a chain of 12 for 2 rows
–Switch to a white yarn
Crochet 1 sc in each chain, except at the ends
For the ends, DC in each chain to create an ovalSew the mouth, ears, button eyes and pom-pom onto the hat
I have made a few different variations of the sock monkey as they were specially requested.


If you use this pattern, we would love to see your creations! Post a picture in the comments 🙂
~Pali